Tutorial to make the pattern and hat by Indietutes
Or buy the pattern from her Etsy shop.
Wednesday, June 30, 2010
Wednesday, June 23, 2010
Red Velvet [Cup]Cakes
Amped Up Red Velvet Cupcakes by Megan B. at Shelterrific
(Adapted from a recipe by the Magnolia Bakery)
Makes 2 dozen cupcakes
3 cups cake flour (not self-rising)
3/4 cup (1 1/2 sticks) unsalted butter, softened
2 cups sugar
3 large eggs, at room temperature
6 tbs liquid red food coloring (or 2 tbs food coloring paste and 4 tbs water )
1/4 cup plus 3 tablespoons red cocoa
1/4 cup natural cocoa (like Hershey)
1 1/2 teaspoons vanilla extract
1 1/2 teaspoons salt
1 1/2 cups buttermilk
1 1/2 teaspoons cider vinegar
1 1/2 teaspoons baking soda
Preheat oven to 375F.
Sift the cake flour into a small bowl; set aside.
Cream the butter and sugar in a large bowl until light and flufffy (with the mixer on medium speed), about five minutes. Add the eggs, one at a time, beating well after each addition.
In a medium sized bowl, whisk together the red food coloring, cocoa, and vanilla (adding a bit of water if necessary to make a smooth paste). Add to the batter and beat well.
In a measuring cup, stir the salt into the buttermilk. Add to the batter in three parts, alternating with the flour. With each addition, beat until the ingredients are incorporated, but do not overbeat.
In a small bowl, stir together the cider vinegar and baking soda. Add to the batter and mix well. Using a rubber spatula, scrape down the batter in the bowl, making sure the ingredients are well blended and the batter is smooth.
Use two muffin pans, each with 12 muffin cups (1/2 cup each), and line each cup with a paper liner. Arrange the oven racks in the upper and lower thirds of the oven. Switch positions of the pans midway through baking. Bake about 20 minutes or until a tester comes out clean.
Cool the cupcakes in the pan 10 minutes, then remove and cool completely on a rack before icing. To ice, mound a generous spoon of cream cheese frosting on top of each cupcake and use an icing spatula to make a swirl on top. If desired, decorate with sanding sugar.
Monday, June 21, 2010
Miniature Gardening

Janit Calvo's miniature gardening site has me daydreaming about dressing up my potted plants a bit. Her site has loads of inspirational photos, tips, and best of all, supplies you can buy. You can do your research and sourcing all at once.
Janit Calvo's Blog
Her miniature gardening supply center
Aliens by Thyrza
Tentacles, Part II
You cannot have too many tentacles.
 Image by Thyrza Segal
Thyrza Segal makes the most delightful tentacled creatures. Currently, I am agonizing over which one would look best next to my succulent or my variegated geranium.
 Image by Thyrza Segal
Thyrza Segal makes the most delightful tentacled creatures. Currently, I am agonizing over which one would look best next to my succulent or my variegated geranium.
Sunday, June 20, 2010
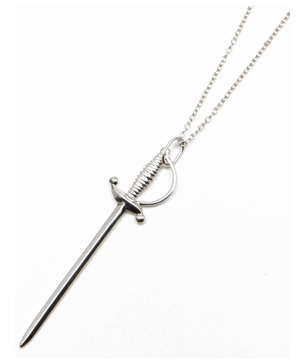
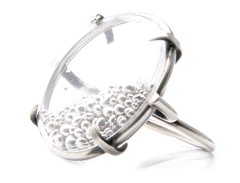
Silhouettes

Materials required:
Photograph
Photoshop (use pen/path)
Frisket Film
Armour Etch Cream
Glass Object
Directions at Craftzine
Monday, June 14, 2010
Blog Tips for David, Part Three
Q: How can you notify people of updates to your blog?
A: They can choose to follow you through Google but if you want to send them an email you need to wrest their email address from them.
Emails can be sent to you for subscription requests but you can also manage them at Wufoo.
people of blog updates:
More discussion here
A: They can choose to follow you through Google but if you want to send them an email you need to wrest their email address from them.
1. Go to http://wufoo.comMore discussion here
2. Sign up for free
3. Create a form (you get three for free)
4. Select email from the templates on the left; customize it
5. Enter the email you want to to use in order to know who wants to
subscribe or skip this. You can manage subscription requests at Wufoo
6. Click on the Forms tab at the top of the page
7. Click Embed Form Code on the left (or choose the format you prefer, I
like the pop-up form)
8. Highlight and copy the html in the first field
9. Go to your blog
10. Select Design
11. Select Page Elements
12. Select Add a Gadget
13. Select Html/Javascript
14. Paste the html code (step 7) in the Content field
Emails can be sent to you for subscription requests but you can also manage them at Wufoo.
1. Go to http://wufoo.comBut you still have to use Google Groups (or something similar) to notify more than ten
2. Click on the Forms tab at the top of the page
3. Click on the Entries under the form that you created
4. Select an entry (an email address)
5. Select Bulk Actions
6. Select Export
7. Select your format for export (.csv seems most promising); a file will
download to your desktop
people of blog updates:
More discussion here
Chawan Mushi
From Bitten ...
Steamed Eggs à la Harbin Restaurant
Yield 4 servings
Time 40 minutes
Eva Chang
Ingredients
* 2 cups vegetable broth, at room temperature
* 1 teaspoon cornstarch
* 4 large eggs
* freshly ground white pepper or black pepper
* 1 teaspoons plus 2 tablespoons vegetable oil
* 3 scallions, chopped
* 1 teaspoon cornstarch
* 5 large dried shiitake mushrooms, soaked until softened, squeezed dry, stems trimmed and discarded, thinly sliced
* 1/4 cup fresh or frozen peas
* 1/4 cup garlic chives, ends trimmed, cut in 1-inch lengths
* 1/2 teaspoon sugar
* 1 tablespoon soy sauce
Method
* 1. Bring several inches of water to boil in the bottom of a large steamer. In a small bowl, combine 3 tablespoons of the vegetable broth with the cornstarch; mix well.
* 2. Place the eggs in a shallow 1 1/2 to 2 quart baking dish, and beat until foamy. Add the remaining vegetable broth, a dash of white or black pepper, and one teaspoon oil. Beat again gently until well-blended. Allow any foam to subside until the surface is completely smooth.
* 3. Place the dish in the steamer, cover, and lower heat to medium. Steam until a knife inserted into the eggs comes out clean, 20 to 25 minutes. Meanwhile, in a wok over medium heat, add the remaining 2 tablespoons oil, and heat until shimmering. Add scallions, and stir-fry 2 to 3 minutes. Add mushrooms, peas, garlic chives, sugar and soy sauce. Stir-fry 2 to 3 minutes. Add cornstarch mixture, and stir-fry 1 minute.
* 4. When the eggs are ready, pour the mushroom mixture over the eggs. If desired, serve over rice.
Source: Adapted from Eva Chang and the Harbin Restaurant, published in "Chinese Home Cooking" by Elaine Louie and Julia Chang Bloch for the Organization of Chinese American Women (1985).
Wednesday, June 9, 2010
Scale Railroads: Briefcase
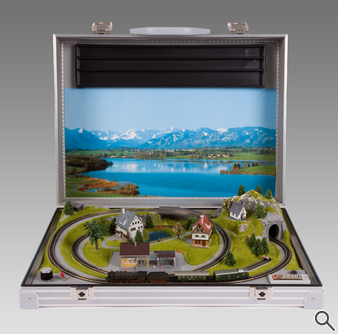
Noch aluminium brief case with "Blumenau" model train set with a high-quality ready assembled summer landscape and pictured background. The ready-to-run route passes over the mountain and winds under the mountain tunnel system. The set includes one locomotive with two carriages supplied (colours may vary).
The "Blumenau" utilizes an integrated 9 volt battery holder and throttle controller. The high quality throttle allows you to control the trains at scale speeds and it is very efficient 37 cm, A Pre-installed adapter socket is included.
The brief case is lockable and keys are supplied. Instructions included.
Paul Smith used to take this train set to Japan on his early trips and would produce it at meetings when he became bored. This caused great surprise and helped to establish his personality with his colleagues in Japan.
Where
Tuesday, June 8, 2010
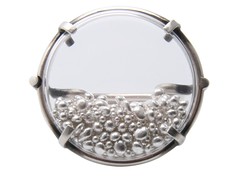
Glove Mold
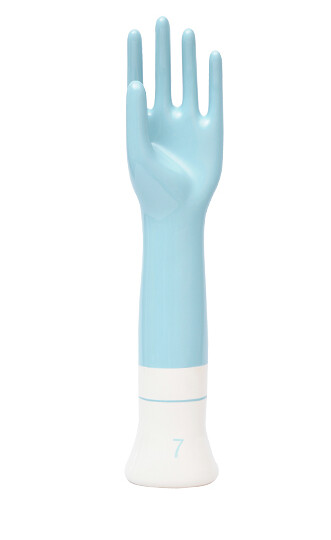 Image by Fishes Eddy
How nice to know that you don't have to settle for the nasty antique variety with
Monday, June 7, 2010


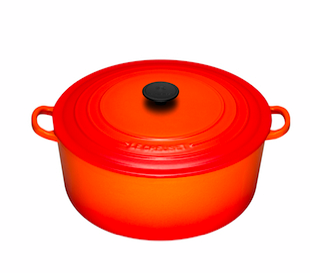
Le Creuset
 |  |
| |
Images from Le Creuset
The age old question is whether to get the iconic flame colour or the very classic white.
Also, what size is best? Only Cookware has some ideas about this.
I have a 5.5 quart Dutch oven but I am cooking for 2...it could handle up to 4 quite easily as long as you don't have big eaters in the house. For 4 to 8 people I would go with a 7 quart or 9 quart oval French oven. Any more than this and you would probably be starting to look at the 13 quart the 15 quart oval Dutch oven.
On sale now at Cookware.com
Sunday, June 6, 2010
Duffels and Ditty Bags
These have a lovely, practical shape. I can see them working as a toy bin, a tool box, a knitting bag ...
They come in small and large sizes and in one or two colours.
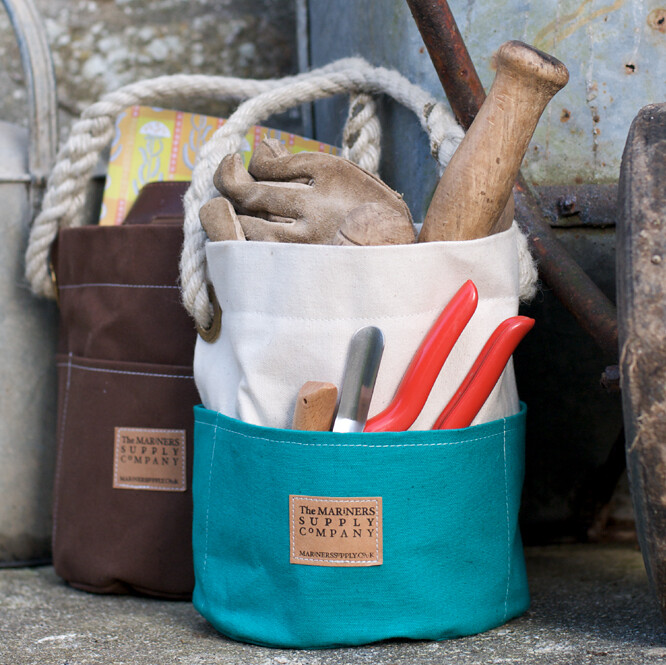 Image from Mariners Supply Company
Duffels do not usually appeal to me but the colours of this one are so saturated and beautiful.
 Image by Cynthia Rowley
They come in small and large sizes and in one or two colours.
Image from Mariners Supply CompanyDuffels do not usually appeal to me but the colours of this one are so saturated and beautiful.
Image by Cynthia Rowley
Saturday, June 5, 2010
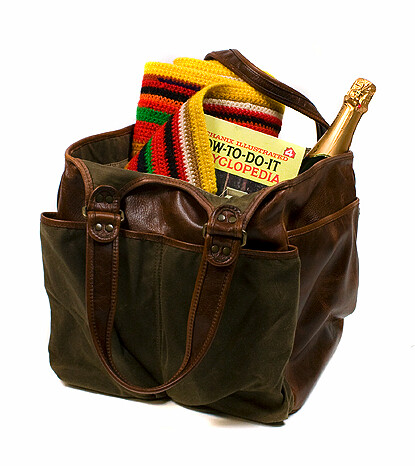
Bag Lady
 Duck Tote by Baggu
"Carry in your hand, on your shoulder or across your chest. Brings home everything from a laptop to groceries.History
16" high / 10" wide / 5.5" deep. 40" adjustable shoulder strap. Snap Closure. Interior pocket.
16oz recycled cotton canvas."
UPDATE: Just like the rest of the Baggu family, these are fantastic! They hold so much and are very comfortable to carry, even when overloaded. Mine can hold a laptop, a full set of construction drawings, knitting/crochet project, camera, cardigan, wallet, cosmetics bag, baby bottle, and technology bag (i.e., iPod and mobile). I might get another for gym stuff!
Friday, June 4, 2010


Wednesday, June 2, 2010

Youvetsi
Youvetsi
Adapted from Falling Cloudberries by Tessa Kiros
Ingredients
2 medium red onions, finely chopped (approximately 1 1/2 cups)
2-4 cloves of garlic, minced
3 tbsp. olive oil
5 tbsp. unsalted butter, divided
2 lbs. lamb leg or shoulder, cut into 1-inch cubes
28 oz. can of crushed tomatoes
4 c. organic chicken stock
1 cinnamon stick
16 oz. uncooked orzo
Kosher salt & fresh ground black pepper
4-8oz. haloumi or alternate cheese (e.g. parmigiano reggiano, pecorino, grana padano, feta)
1. Preheat oven to 350 degrees Farenheit. Heat the olive oil and 2 tbsp. butter over a medium-high flame/heat in a large heavy pot or dutch oven.
2. Pat dry the lamb chunks and season liberally with salt and pepper. Brown the lamb. You may need to do this in 1/2 lb. batches to avoid overcrowding it. Turn it once or twice to get a nice all-over sear without burning. Set aside the lamb in a bowl.
3. Add a little olive oil to the fat and juices remaining in the pan, if necessary. Add the onions and garlic and sauté until the onions are softened. Add a pinch of salt to encourage the onions to release their liquid. Do not overcook (i.e., softened but not browned).
4. Add the meat with its accumulated juices to the pot. Stir in the crushed tomatoes, remaining 3 tbsp. of butter, the cinnamon stick and 4 cups of stock/water. Bring to a boil then cover and move the pot to the oven. Cook for 60 to 90 minutes until lamb is tender.
5. Remove the pot from the oven.Remove the cinnamon stick.
6. Stir in the orzo and return the covered pot to the oven. If you serve the dish right away, leave it in the oven for a further 15 minutes, stirring once. If there is delay before you serve it, leave it in the oven for about 7 minutes, then remove the pot but leave it covered.
7) Add the cheese and stir it to combine. Serve.
Tuesday, June 1, 2010
See You at the Sand
 Scene from "Five Brothers", The Unit
I love this scene.
The dialogue is so testosterone-y. It makes me laugh even though the boys are in such dire straits.
Jonas: A'right. Ten long blocks to the beach. No stoppin.' You ready?
Beaten Man: *nods*
Mack: Hell yeah.
Bob: Cakewalk time.
Jonas: He good?
Hector: He loves the beach.
*Hector checks Charles's pulse*
Jonas: Hmph.
Charles: Groan.
Mack: I've got the *mumble, mumble*
Jonas [to beaten man]: We're gettin' you home.
*Jonas walks to doors, turns.*
Jonas: See you at the sand ... in three, two ... *bursts through doors*
*The team enters the alley. Jonas pulls up short.*
*Soldiers pur out of a truck at the end of the alley.*
Jonas: Well, ain't that a sight.
Unknown offscreen voice: Who are they?
Jonas: That is the Unted States Marines!
*The team runs to the truck."
Watch it here: http://www.megavideo.com/?v=1PQ7IQYJ
(Jump to 41:41)
It reminds me of another favourite:
John Connor in Terminator Salvation screaming,"If we stay the course, we're dead, we're all dead!"
Aw, c'mon, John. Relax.
Blog Tips for David, Part Two
Photo Layout
This is the trickiest one and will get you doing some html.
First select the "Layout" tab. Then click on "Edit HTML." This will launch, suprise, suprise, the html editor. Now scroll down through the html of your blog and find this (click on this image to zoom in on the text):

All you need to do is make note of the width.
My blog's width is apparently 410px.

When you upload your pictures, you will need to make sure that they are less than half this width and that both are the same width as each other (e.g., 200px).
Following is an example.
What is better than one Lady Gaga? Two Lady Gagas!
Here is the picture we will use:

And this is the html code for the picture:

STEP 1: Import the picture.
STEP 2: Resize the picture.
GaGa's picture is wider than 200px. GaGa is 254px.
Let's slim down GaGa! I replace "254px" with "200px" so that she can fit twice.

And erase the height value (it is also 254px because our picture is square):

And we get this:
STEP 3: Let's put two photos side by side.
Type this:

Immediately paste the html for the photo directly after it on the same line.

Paste this immediately after the photo's html on the same line:

Hit the Return button.
Repeat STEPS 2 through 3.
STEP 4: Paste this on the next line.

Which gives you this:
Ta-Da!!
This is the trickiest one and will get you doing some html.
First select the "Layout" tab. Then click on "Edit HTML." This will launch, suprise, suprise, the html editor. Now scroll down through the html of your blog and find this (click on this image to zoom in on the text):

All you need to do is make note of the width.
My blog's width is apparently 410px.

When you upload your pictures, you will need to make sure that they are less than half this width and that both are the same width as each other (e.g., 200px).
Following is an example.
What is better than one Lady Gaga? Two Lady Gagas!
Here is the picture we will use:
And this is the html code for the picture:

STEP 1: Import the picture.
STEP 2: Resize the picture.
GaGa's picture is wider than 200px. GaGa is 254px.
Let's slim down GaGa! I replace "254px" with "200px" so that she can fit twice.

And erase the height value (it is also 254px because our picture is square):

And we get this:
STEP 3: Let's put two photos side by side.
Type this:

Immediately paste the html for the photo directly after it on the same line.

Paste this immediately after the photo's html on the same line:

Hit the Return button.
Repeat STEPS 2 through 3.
STEP 4: Paste this on the next line.

Which gives you this:
| |
Ta-Da!!
Blog Tips For David, Part One
Publishing
If you want to regularly notify someone when you update your blog, go to the "Setting" tab and then select "Email & Mobile."Enter the email addresses of the people you want to notify in the "Email Notifications" text entry box.
Sharing
To share a single blog entry once, click on the entry's title to go to that entry's url. Then select the "Share" option from the Blogger menu at the very top of your screen. This small screen will appear:
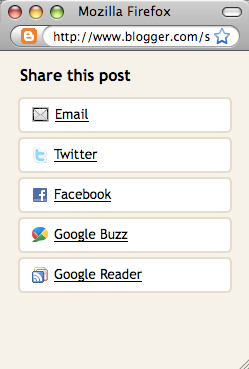 Select how you want to alert them.
Subscribe to:
Posts (Atom)

